


释放双眼,带上耳机,听听看~!
这个项目比较简单,是仅由 ESP8266 和扬声器制成的数字收音机
项目准备
硬件组件
- NodeMCU/ESP8266 开发板× 1
- 扬声器:0.25W,8 欧姆× 1
- 杜邦线(通用)× 1
- 面包板(通用)× 1
软件准备
- Arduino IDE(安装好了ESP8266编译环境)
项目故事
我想制作一个简单、易于制作的 wifi 收音机,只有一个 ESP8266 和一个扬声器。这个代码不是我的,但我想向其他人展示如何让它运行,因为看到 ESP8266 制作收音机真的很有趣。
原理图
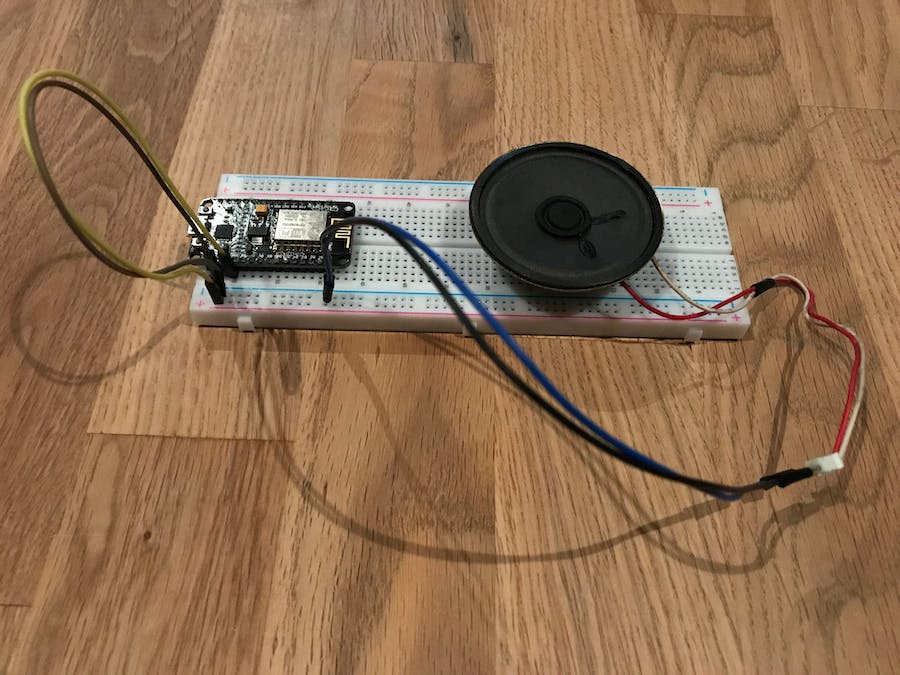
接线图
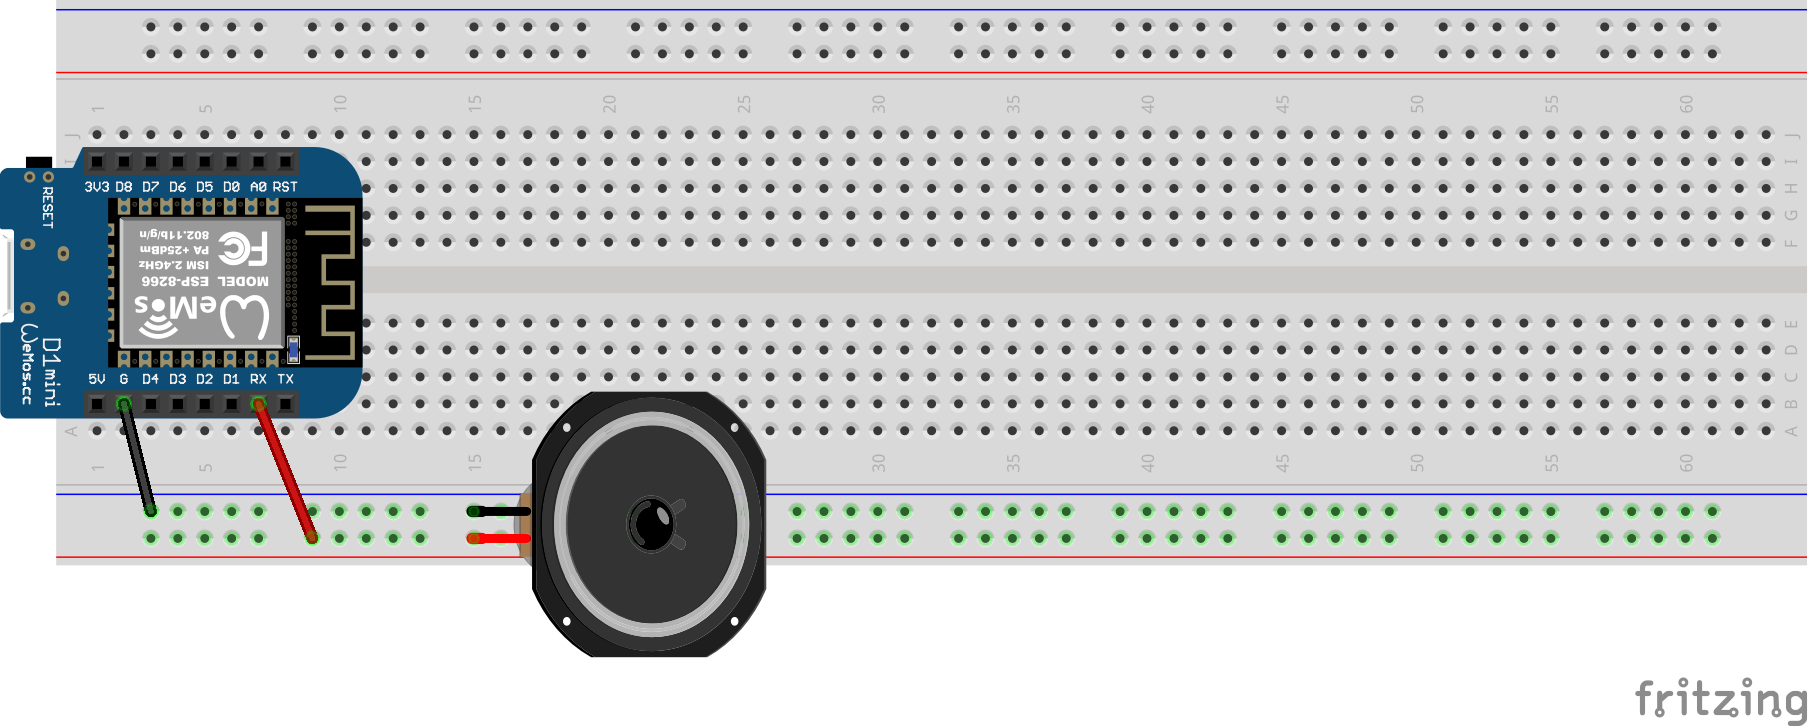
以上就是将 esp8266 与扬声器连接的方式。将扬声器正极连接到 ESP 的 RX 和接地到G,可以串联一个 50 µF 的电容,通过过滤噪声来提高音质。
安装库
运行此项目需要先安装库,相关的说明可以在一下库链接页面查看:
运行代码
#include <Arduino.h>

#ifdef ESP32
    #include <WiFi.h>
#else
    #include <ESP8266WiFi.h>
#endif
#include "AudioFileSourceICYStream.h"
#include "AudioFileSourceBuffer.h"
#include "AudioGeneratorMP3.h"
#include "AudioOutputI2SNoDAC.h"

// To run, set your ESP8266 build to 160MHz, update the SSID info, and upload.

// Enter your WiFi setup here:
const char *SSID = "ssid";
const char *PASSWORD = "password";

const char *URL="http://mms.hoerradar.de:8000/rst128k";//Radio RST(German)
//const char *URL="http://ndr-edge-206c.fra-lg.cdn.addradio.net/ndr/njoy/live/mp3/128/stream.mp3";//NJOY (German)

AudioGeneratorMP3 *mp3;
AudioFileSourceICYStream *file;
AudioFileSourceBuffer *buff;
AudioOutputI2SNoDAC *out;

// Called when a metadata event occurs (i.e. an ID3 tag, an ICY block, etc.
void MDCallback(void *cbData, const char *type, bool isUnicode, const char *string)
{
  const char *ptr = reinterpret_cast<const char *>(cbData);
  (void) isUnicode; // Punt this ball for now
  // Note that the type and string may be in PROGMEM, so copy them to RAM for printf
  char s1[32], s2[64];
  strncpy_P(s1, type, sizeof(s1));
  s1[sizeof(s1)-1]=0;
  strncpy_P(s2, string, sizeof(s2));
  s2[sizeof(s2)-1]=0;
  Serial.printf("METADATA(%s) '%s' = '%s'n", ptr, s1, s2);
  Serial.flush();
}

// Called when there's a warning or error (like a buffer underflow or decode hiccup)
void StatusCallback(void *cbData, int code, const char *string)
{
  const char *ptr = reinterpret_cast<const char *>(cbData);
  // Note that the string may be in PROGMEM, so copy it to RAM for printf
  char s1[64];
  strncpy_P(s1, string, sizeof(s1));
  s1[sizeof(s1)-1]=0;
  Serial.printf("STATUS(%s) '%d' = '%s'n", ptr, code, s1);
  Serial.flush();
}


void setup()
{
  Serial.begin(115200);
  delay(1000);
  Serial.println("Connecting to WiFi");

  WiFi.disconnect();
  WiFi.softAPdisconnect(true);
  WiFi.mode(WIFI_STA);

  WiFi.begin(SSID, PASSWORD);

  // Try forever
  while (WiFi.status() != WL_CONNECTED) {
    Serial.println("...Connecting to WiFi");
    delay(1000);
  }
  Serial.println("Connected");

  audioLogger = &Serial;
  file = new AudioFileSourceICYStream(URL);
  file->RegisterMetadataCB(MDCallback, (void*)"ICY");
  buff = new AudioFileSourceBuffer(file, 2048);
  buff->RegisterStatusCB(StatusCallback, (void*)"buffer");
  out = new AudioOutputI2SNoDAC();
  mp3 = new AudioGeneratorMP3();
  mp3->RegisterStatusCB(StatusCallback, (void*)"mp3");
  mp3->begin(buff, out);
}


void loop()
{
  static int lastms = 0;

  if (mp3->isRunning()) {
    if (millis()-lastms > 1000) {
      lastms = millis();
      Serial.printf("Running for %d ms...n", lastms);
      Serial.flush();
     }
    if (!mp3->loop()) mp3->stop();
  } else {
    Serial.printf("MP3 donen");
    delay(1000);
  }
}
以上代码记得修改WIFI连接信息:
// Enter your WiFi setup here:
const char *SSID = "ssid";
const char *PASSWORD = "password";
上传完成之后,打开串口监视器查看WIFI连接信息,连接成功则小型收音机制作完成。
更多使用方式,可以查看库作者的页面介绍。


ndbsb
学习学习
好项目。谢谢分享。