

简介
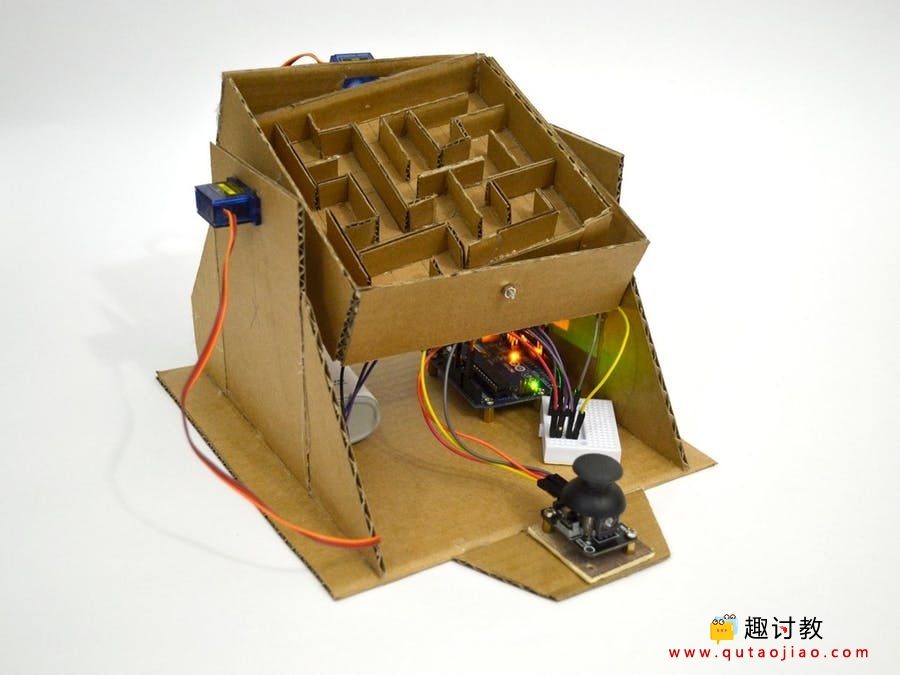
我将向您展示如何制作Arduino控制的纸板迷宫游戏,它非常简单有趣。最棒的是它是由纸板制成的。游戏规则就是通过控制倾斜方向,最短实践内到达出口获胜。
当然,有很多想法可以改进这个游戏,例如在最后布置一些传感器,例如在接近出口的时候通过蜂鸣器控制节奏,甚至在迷宫中挖一些洞。
步骤一 材料准备
硬件准备:
arduino uno x1
SG90伺服电机 x2
面包板 x1
操纵杆 x1
跳线 x1
工具刀 x1
胶枪 x1
软件准备:arduino IDE
步骤二 原理说明
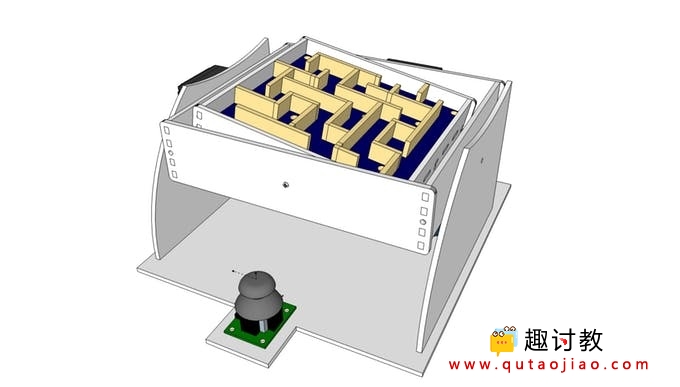
设计草图如上如所示,通过操纵杆控制两个维度的倾斜角度,使得迷宫内的玻璃球在躲避坑洞的前提下到达出口才算挑战完成。
步骤三 实物及电路搭建
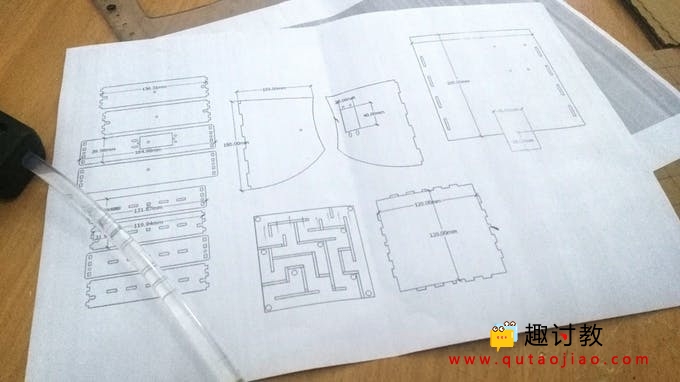
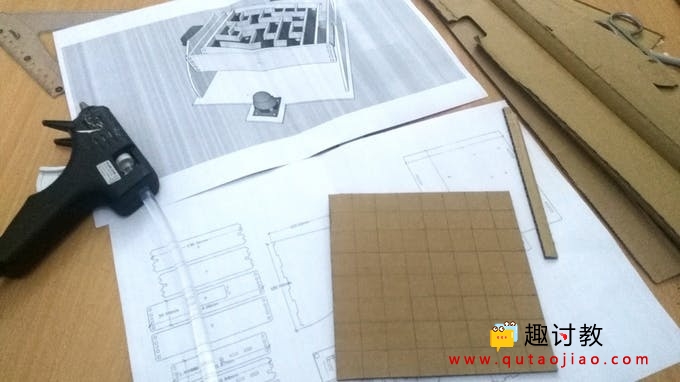
实物搭建(详细设计图纸见附件)
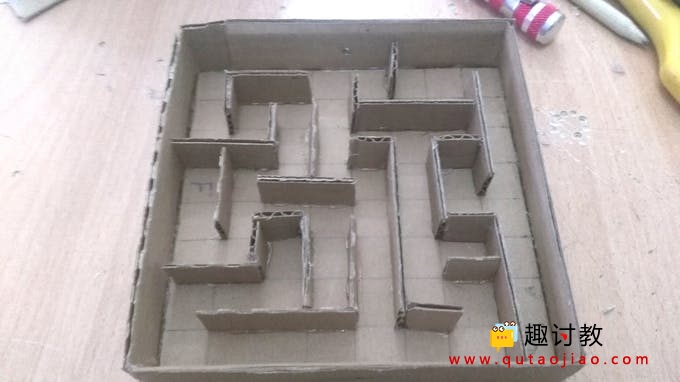
首先我们应该搭建迷宫,根据下面图片提示进行搭建。
1.为迷宫底部切出一个20厘米乘20厘米的正方形。
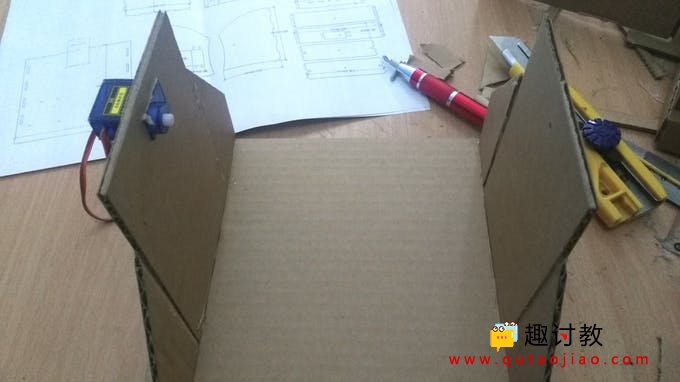
2.在迷宫的两侧切出两个14厘米乘16厘米的等腰梯形。
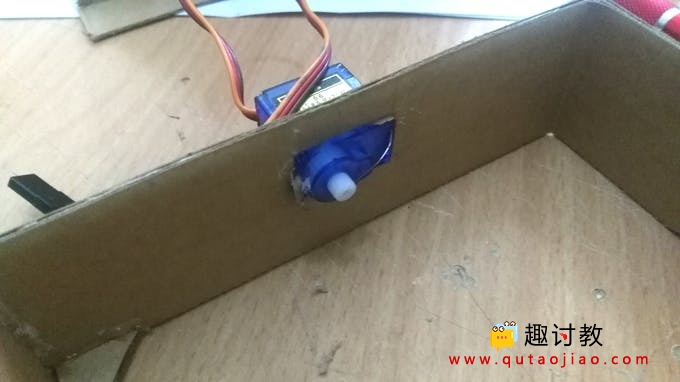
3.在这两个部件中的一个中为伺服电机(X轴)制作一个矩形孔。
4.在另一侧的正中间钻一个3mm的孔,使其与另一侧(X轴)的伺服轴相对。
5.接下来,您需要在迷宫内部切出四个14厘米×4厘米的矩形支撑。
6.在另一侧的正中间钻一个3mm的孔,使其与另一侧(Y轴)的伺服轴相对。
7.在中间制作一个矩形孔,如伺服电机(Y轴)的四个部件之一所示。
8.从文章中的附件中选择你自己的迷宫,然后切出12厘米乘12厘米的方块作为迷宫。
9.你需要在迷宫的墙壁上切出至少8个1.5厘米×12厘米的矩形。接下来你需要切割它们,使它们的尺寸合适,并且可以适合你的迷宫。
10.按照引导线将胶片粘在其位置,成为迷宫的墙壁。
11.如图所示,将伺服电机粘贴在适当位置。
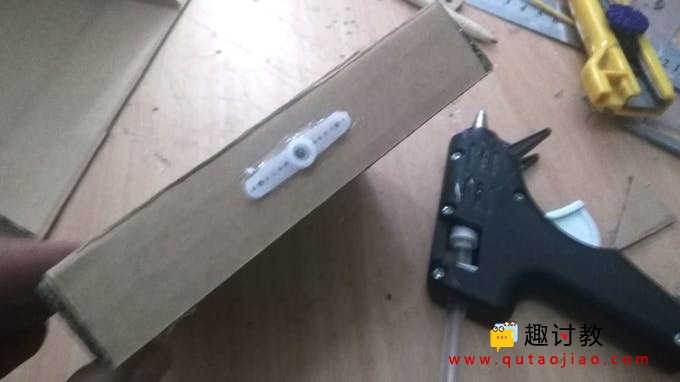
12.将伺服电机喇叭粘在矩形件上。
硬件连接:
布线
Arduino引脚8到伺服1中的黄线(X轴)
Arduino引脚9到伺服1中的黄线(Y轴)
红色和棕色电线到面包板。
Arduino引脚A0到操纵杆引脚VRx
Arduino Pin A1至操纵杆针脚VRy
操纵杆VCC和GND到面包板。
Arduino 5V和GND到面包板。

步骤四 编写程序
#include <servo.h>

Servo myServoX; // define servo motor for X-axis

Servo myServoY; // define servo motor for Y-axis

int ServoXPin = 8; // define  X-axis pin

int ServoYPin = 9; // define  Y-axis pin

int ServoXHomePos =90; // set home position for servos

int ServoYHomePos =90;

int ServoXPos =103;

int ServoYPos =135;

int XAxlePin = A0; // define  X-axis pin control for joystick A0

int YAxlePin = A1; // define  Y-axis pin control for joystick A1

int XAxleValue = 0; // set start up value for joystick

int YAxleValue = 0;

int Direction = 0;

int range = 12; // output range of X or Y movement

int center = range/2; // resting position value

int threshold = range/4; // resting threshold

void setup()

{

myServoX.attach(ServoXPin); // attaching servo X

myServoY.attach(ServoYPin); // attaching servo Y

ServoXPos = ServoXHomePos;  // update ServoXPos with home position as startup

ServoYPos = ServoYHomePos;  // update ServoYPos with home position as startup

myServoX.write(ServoXPos);
myServoY.write(ServoYPos);

Serial.begin(9600);

}

void loop()

{

XAxleValue = readAxis(XAxlePin);

YAxleValue = readAxis(YAxlePin);


Serial.print(XAxleValue,DEC);

Serial.print(" - ");

Serial.println(YAxleValue,DEC);


// check the values of joystick and move the servos smothly with delay of 100 millisecond

if (XAxleValue>0) { ServoXPos++; myServoX.write(ServoXPos); delay(100*(7-XAxleValue)); }

if (XAxleValue<0) { ServoXPos--; myServoX.write(ServoXPos); delay(100*(7+XAxleValue)); }

if (YAxleValue>0) { ServoYPos++; myServoY.write(ServoYPos); delay(100*(7-YAxleValue)); }

if (YAxleValue<0) { ServoYPos--; myServoY.write(ServoYPos); delay(100*(7+YAxleValue)); }


if (ServoXPos>ServoXHomePos+20) { ServoXPos=ServoXHomePos+20; }

if (ServoXPos-20) { ServoXPos= ServoXHomePos-20; }

if (ServoYPos>ServoYHomePos+20) { ServoYPos=ServoYHomePos+20; }

if (ServoYPos-20) { ServoYPos= ServoYHomePos-20; }

delay(10);

}

int readAxis(int thisAxis) {

// read the analog input:

int reading = analogRead(thisAxis);

// map the reading from the analog input range to the output range:

reading = map(reading, 0, 1023, 0, range);

// if the output reading is outside from the

// rest position threshold, use it:

int distance = reading - center;

if (abs(distance) < threshold) {

distance = 0;

}
余下程序:
步骤五 验证结果
可以实现相应的功能,电路正常工作,控制方向正常,可以稳定使用。


