

介绍
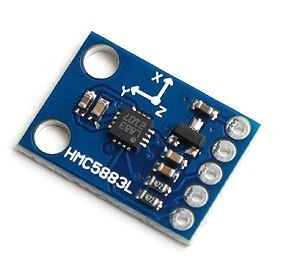
HMC5883L磁力计模块
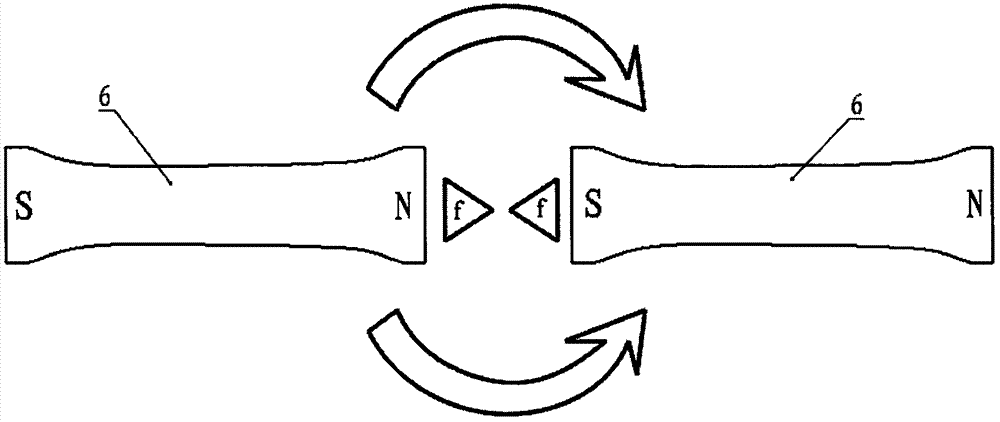
磁力计HMC5883L测量地球磁场的方向和大小,因此用于低成本的罗盘和磁力测量。
它测量沿X,Y和Z轴的地球磁场值,从milli-gauss到8gauss。
它可以用作指南针来查找方向或找到设备前进方向。
它利用I2C协议与微控制器进行通信。通过使用I2C通信从某些寄存器的地址读取值,可以找到沿X,Y和Z轴的地球磁场值。
连接图
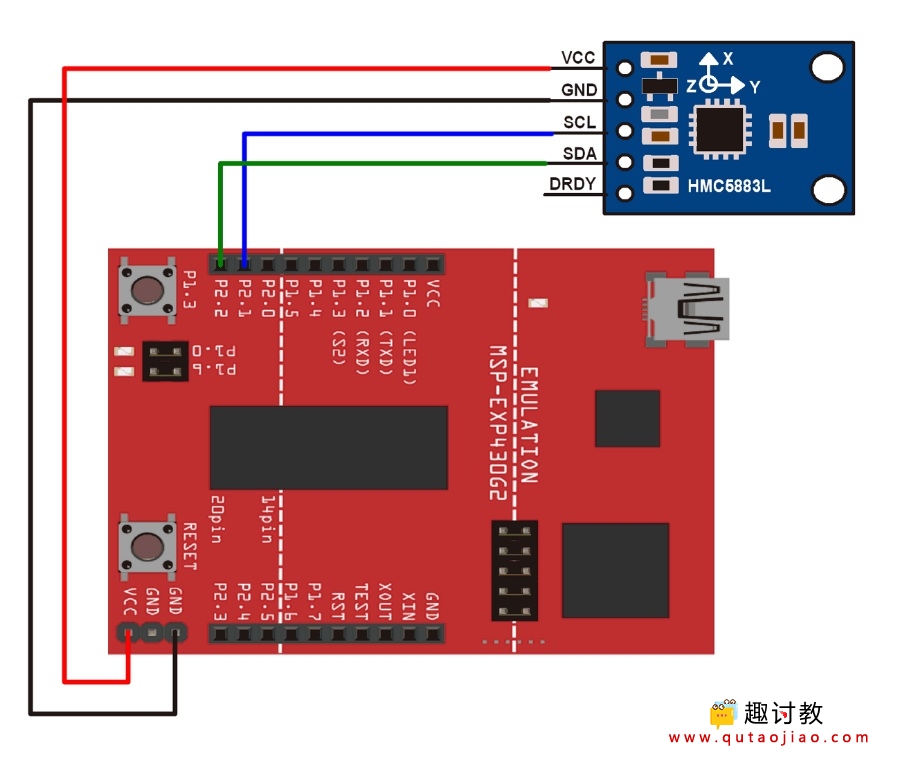
HMC5883L磁力计模块与MSP-EXP430G2 TI Launchpad连接
例
使用磁力计模块查找航向。
在这里,我们将使用来HMC5883L库。该库适用于Arduino,但适用于MSP-EXP430G2 TI Launchpad以及少量修改
库下载
提取库并将其添加到Energia IDE的库文件夹路径中。
有关如何将自定义库添加到Energia IDE并使用其中的示例的信息,请参阅“基础知识”部分中的“ 将库添加到Energia IDE ”。
如果从上面给出的链接下载库,打开HMC5883L_Simple.h文件并将int变量X,Y和Z更改为MagnetometerSample结构中的X1,Y1和Z1。类似地,在HMC5883L_Simple.cpp中进行更改,将所有出现的int变量X替换为X1,Y替换为Y1,将Z替换为Z1。
为方便起见,我们在下面给出的附件部分中提供了修改后的库。
将库添加到Energia IDE后,打开IDE并从添加的库中打开指南针的示例程序。
需要注意的是,在上述库中,附近铁质材料的倾斜和影响没有得到补偿。如需补偿,我们可以参考随附的应用说明。
另请注意,作者在示例草图中为其位置指定了偏角。使用您所在位置的偏角,并相应地进行适当的更改。
重要提示: MSP-EXP430G2 TI Launchpad的SCL和SDA分别位于引脚14(P1_6)和15(P1_7)上。Energia IDE利用基于软件的I2C实现(twi_sw)为MSP-EXP430G2 TI Launchpad。这种基于软件的I2C实现通过引脚9(P2_1)和10(P2_2)定义为SCL和SDA引脚。因此,我们需要将这些引脚用于Energia的I2C功能(在大多数库中使用),以便在MSP-EXP430G2 TI Launchpad板上工作。这已在Energia 17和18上完成(我们尚未检查IDE的早期版本)。
所有Launchpad主板都不是这种情况。这样做是为了使TI提供的助推器包适用于所有的发射台。
注意: MSP-EXP430G2 TI Launchpad主板具有512字节的RAM,可轻松上传,尤其是在使用不同库时。有时您需要串行缓冲区足够大以包含所需的数据,并且您必须修改串行库的缓冲区大小。在做这些事情时,我们必须确保代码不会使用超过70%的RAM。这可能导致代码以不稳定的方式工作,有时运行良好并且在其他方面失败。
有些时候RAM使用率可能会超过70%并且代码将完全正常工作,并且即使RAM使用率为65%,代码也无法工作。
在这种情况下,可能需要对缓冲区大小和/或变量进行一些试验和错误。
程序
/*
 *
 * Compass.ino - Example sketch for reading a heading from an HMC5883L triple axis magnetometer.
 *
 * GY-273 Compass Module  ->  Arduino
 * VCC  -> VCC  (See Note Below)
 * GND  -> GND
 * SCL  -> A5/SCL, (Use Pin 21 on the Arduino Mega)
 * SDA  -> A4/SDA, (Use Pin 20 on the Arduino Mega)
 * DRDY -> Not Connected (in this example)
 *
 * Voltage Note
 * ~~~~~~~~~~~~
 * The GY-273 Board has a 3v3 Regulator on it, and the SDA/SCL are pulled up to that so it is OK to
 * use with 5v Arduino's.
 *
 * If you are using any other breakout, or the raw IC, you need to be using 3v3 to supply and signal!
 *
 * Datasheet: http://goo.gl/w1criV
 *
 * Copyright (C) 2014 James Sleeman
 *
 * Permission is hereby granted, free of charge, to any person obtaining a
 * copy of this software and associated documentation files (the "Software"),
 * to deal in the Software without restriction, including without limitation
 * the rights to use, copy, modify, merge, publish, distribute, sublicense,
 * and/or sell copies of the Software, and to permit persons to whom the
 * Software is furnished to do so, subject to the following conditions:
 *
 * The above copyright notice and this permission notice shall be included in
 * all copies or substantial portions of the Software.
 *
 * THE SOFTWARE IS PROVIDED "AS IS", WITHOUT WARRANTY OF ANY KIND, EXPRESS OR
 * IMPLIED, INCLUDING BUT NOT LIMITED TO THE WARRANTIES OF MERCHANTABILITY,
 * FITNESS FOR A PARTICULAR PURPOSE AND NONINFRINGEMENT. IN NO EVENT SHALL THE
 * AUTHORS OR COPYRIGHT HOLDERS BE LIABLE FOR ANY CLAIM, DAMAGES OR OTHER
 * LIABILITY, WHETHER IN AN ACTION OF CONTRACT, TORT OR OTHERWISE, ARISING FROM,
 * OUT OF OR IN CONNECTION WITH THE SOFTWARE OR THE USE OR OTHER DEALINGS IN
 * THE SOFTWARE.
 *
 * @author James Sleeman, http://sparks.gogo.co.nz/
 * @license MIT License
 *
 */

#include
#include
#include

// Create a compass
HMC5883L_Simple Compass;

void setup()
{
  Serial.begin(9600);
  Wire.begin();// Magnetic Declination is the correction applied according to your present location// in order to get True North from Magnetic North, it varies from place to place.// // The declination for your area can be obtained from http://www.magnetic-declination.com/// Take the "Magnetic Declination" line that it gives you in the information, //// Examples://   Christchurch, 23° 35' EAST//   Wellington  , 22° 14' EAST//   Dunedin     , 25° 8'  EAST//   Auckland    , 19° 30' EAST//
  Compass.SetDeclination(-0, 23, 'W');  // The device can operate in SINGLE (default) or CONTINUOUS mode//   SINGLE simply means that it takes a reading when you request one//   CONTINUOUS means that it is always taking readings// for most purposes, SINGLE is what you want.
  Compass.SetSamplingMode(COMPASS_SINGLE);// The scale can be adjusted to one of several levels, you can probably leave it at the default.// Essentially this controls how sensitive the device is.//   Options are 088, 130 (default), 190, 250, 400, 470, 560, 810// Specify the option as COMPASS_SCALE_xxx// Lower values are more sensitive, higher values are less sensitive.// The default is probably just fine, it works for me.  If it seems very noisy// (jumping around), incrase the scale to a higher one.
  Compass.SetScale(COMPASS_SCALE_130);// The compass has 3 axes, but two of them must be close to parallel to the earth's surface to read it, // (we do not compensate for tilt, that's a complicated thing) - just like a real compass has a floating // needle you can imagine the digital compass does too.//// To allow you to mount the compass in different ways you can specify the orientation://   COMPASS_HORIZONTAL_X_NORTH (default), the compass is oriented horizontally, top-side up. when pointing North the X silkscreen arrow will point North//   COMPASS_HORIZONTAL_Y_NORTH, top-side up, Y is the needle,when pointing North the Y silkscreen arrow will point North//   COMPASS_VERTICAL_X_EAST,    vertically mounted (tall) looking at the top side, when facing North the X silkscreen arrow will point East//   COMPASS_VERTICAL_Y_WEST,    vertically mounted (wide) looking at the top side, when facing North the Y silkscreen arrow will point West
  Compass.SetOrientation(COMPASS_HORIZONTAL_X_NORTH);
}
余下程序:
使用的功能
1. Compass.SetDeclination(degrees, minutes, ‘direction’)
- 用于设置赤纬。只需按度数,分钟和方向给出赤纬。
- 示例,Compass.SetDeclination(-0, 23, ‘W’)
2. Compass.SetSamplingMode(sampling_mode)
- 用于设置采样模式; COMPASS_SINGLE(单读)或COMPASS_CONTINUOUS(连续读数)。
- 示例,Compass.SetSamplingMode(COMPASS_SINGLE)
3. Compass.SetScale(scale)
- 用于设置罗盘灵敏度。
- 示例,Compass.SetScale(COMPASS_SCALE_130)
4. Compass.SetOrientation(orientation)
- 用于选择安装模块的方向。
- COMPASS_HORIZONTAL_X_NORTH (default),指南针水平定向,顶部朝上。当指向北方时,X丝网箭头将指向北方。
- COMPASS_HORIZONTAL_Y_NORTH,自上而上,Y是指针,当指向北方时,Y丝网箭头指向北方。
- COMPASS_VERTICAL_X_EAST,垂直安装(高)看着顶部,当朝向X时,X丝网箭头指向东方。
- COMPASS_VERTICAL_Y_WEST,垂直安装(宽)看顶部,朝北时Y丝网箭头指向西方。
- 示例,Compass.SetOrientation(COMPASS_HORIZONTAL_X_NORTH)
5. Compass.GetHeadingDegrees()
- 用于获取标题的值。
- 此函数返回一个浮点值,该值从0到359不等。
也可以看看:


