在这个项目中,我们将在带有进度条的 LCD 16×2 上显示 LED 字符。这是一个很好的Arduino初学者项目,可以开始使用LCD显示器。我们提供所需器件列表、原理图和代码。
LCD简介
显示信息的最简单、最便宜的方式是使用 LCD(液晶显示器)。这些存在于日常电子设备中,例如自动售货机、计算器、停车计时器、打印机等,非常适合显示文本或小图标。下图显示了 16×2 LCD 的正面和背面 view.

此 LCD 有 2 行,每行可显示 16 个字符。它还具有 LED 背光,可调整角色和背景之间的对比度。
当您购买 16×2 LCD 时,通常它不附带面包板友好的引脚。因此,您可能需要一些标头。
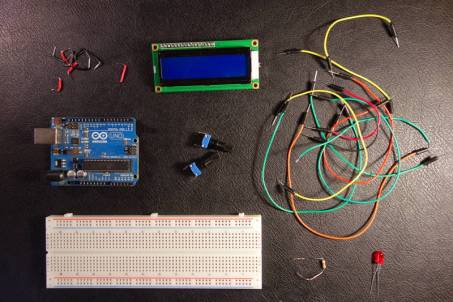
所需零件

对于此项目,您将需要以下部件:
- Arduino UNO
- 1x 面包板
- 1 个 LCD 16×2
- 2x 10k 欧姆电位器
- 1 个 5 毫米 LED
- 1x 220Ohm 电阻器
- 跨接电缆
连接图
按照下图连接所有部件。
下表显示了 LCD 显示屏每个引脚的简要说明。确保您的 LCD 使用相同的引脚排列。

使用方法
复制以下代码并将其上传到Arduino开发板。该代码有很好的注释,因此您可以轻松理解它的工作原理,并对其进行修改以包含在您自己的项目中。
/*
 All the resources for this project:
 https://www.qutaojiao.com/

 Based on some Arduino code examples
*/

// include the library code
#include <LiquidCrystal.h>

// initialize the library with the numbers of the interface pins
LiquidCrystal lcd(12, 11, 5, 4, 3, 2);
int potPin = A0;       // Analog pin 0 for the LED brightness potentiometer
int ledPin = 6;        // LED Digital Pin with PWM
int potValue = 0;      // variable to store the value coming from the potentiometer
int brightness = 0;    // converts the potValue into a brightness
int pBari = 0;         // progress bar
int i = 0;             // foor loop

//progress bar character for brightness
byte pBar[8] = {
  B11111,
  B11111,
  B11111,
  B11111,
  B11111,
  B11111,
  B11111,
};

void setup() {
  // setup our led as an OUTPUT
  pinMode(ledPin, OUTPUT);
  // set up the LCD's number of columns and rows:
  lcd.begin(16, 2);
  // Print a message to the LCD
  lcd.print(" LED Brightness");
  //Create the progress bar character
  lcd.createChar(0, pBar);
}

void loop() {
  // clears the LCD screen
  lcd.clear();
  // Print a message to the LCD
  lcd.print(" LED Brightness");
  //set the cursor to line number 2
  lcd.setCursor(0,1);
  // read the value from the potentiometer
  potValue = analogRead(potPin);
  // turns the potValue into a brightness for the LED
  brightness=map(potValue, 0, 1024, 0, 255);
  //lights up the LED according to the bightness
  analogWrite(ledPin, brightness);
  // turns the brighness into a percentage for the bar
  pBari=map(brightness, 0, 255, 0, 17);
  //prints the progress bar
  for (i=0; i < pBari; i++)
  {
    lcd.setCursor(i, 1);
    lcd.write(byte(0));
  }
  // delays 750 ms
  delay(750);
}
示范
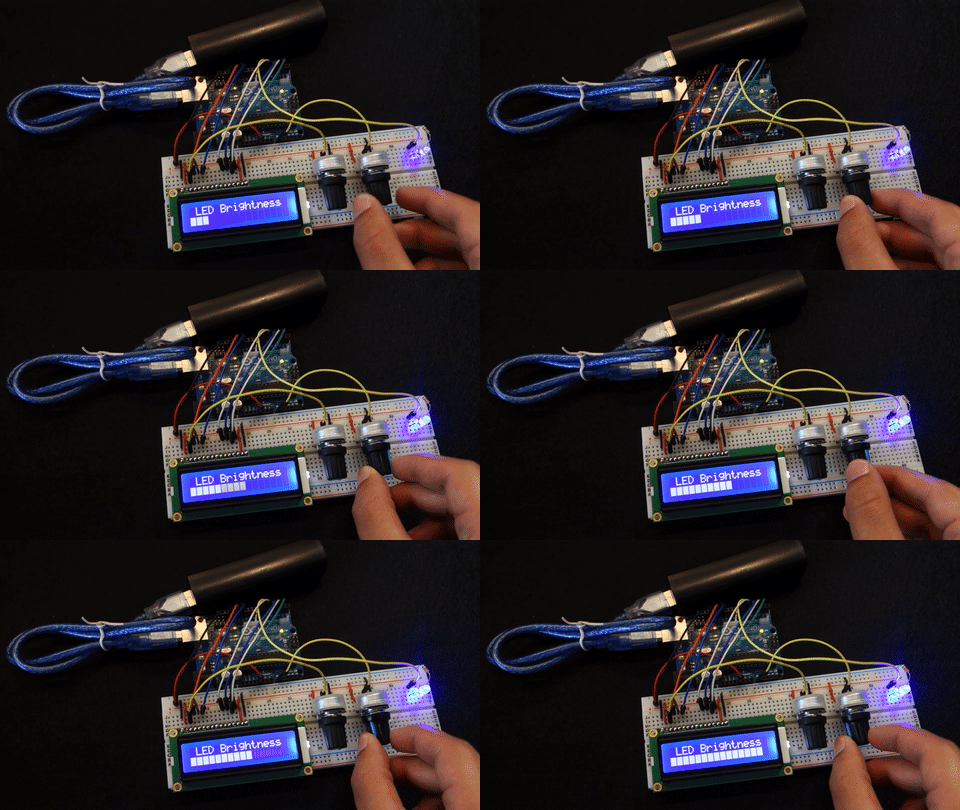
将代码上传到Arduino板后,您可以旋转电位器来调整LED亮度并更改LCD上的进度条。

总结
这篇文章向您展示了一个关于如何在Arduino上使用LCD显示屏的基本示例。现在,我们的想法是修改程序并在其他项目中使用显示。


详细!