


释放双眼,带上耳机,听听看~!
在此项目中,您将使用 Arduino 和可检测运动的 PIR 运动传感器创建一个简单的电路。当检测到移动时,LED 灯会亮起。
PIR 运动传感器简介
PIR 运动传感器非常适合检测运动。 PIR 代表“被动红外线”。基本上,PIR 运动传感器测量其视野内物体的红外光。
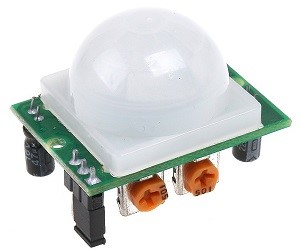
上图中的传感器有两个内置电位器,用于调节设置时间(左侧电位器)和灵敏度(右侧电位器)。
引脚排列
将 PIR 运动传感器连接到 Arduino 非常简单 – 该传感器只有 3 个引脚。
- GND – 连接到地
- OUT – 连接到 Arduino 数字引脚
- 5V – 连接到 5V
所需零件
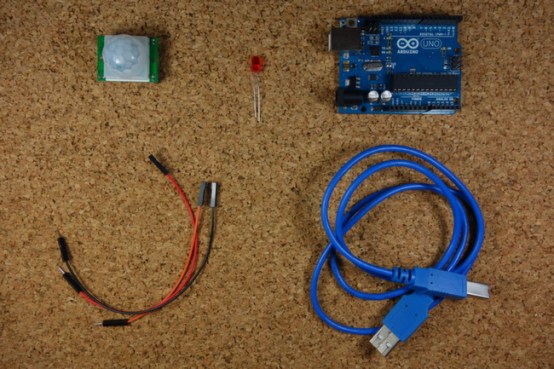
这是该项目所需的部分:
- 1x PIR 运动传感器 (HC-SR501)
- Arduino UNO – 阅读最佳 Arduino 入门套件
- 1 个 LED
- 连接线
原理图
按照下面的示意图组装所有部件。

代码
上传以下代码。
 int led = 13;                // the pin that the LED is atteched to
int sensor = 2;              // the pin that the sensor is atteched to
int state = LOW;             // by default, no motion detected
int val = 0;                 // variable to store the sensor status (value)

void setup() {
  pinMode(led, OUTPUT);      // initalize LED as an output
  pinMode(sensor, INPUT);    // initialize sensor as an input
  Serial.begin(9600);        // initialize serial
}

void loop(){
  val = digitalRead(sensor);   // read sensor value
  if (val == HIGH) {           // check if the sensor is HIGH
    digitalWrite(led, HIGH);   // turn LED ON
    delay(100);                // delay 100 milliseconds

    if (state == LOW) {
      Serial.println("Motion detected!");
      state = HIGH;       // update variable state to HIGH
    }
  }
  else {
      digitalWrite(led, LOW); // turn LED OFF
      delay(200);             // delay 200 milliseconds

      if (state == HIGH){
        Serial.println("Motion stopped!");
        state = LOW;       // update variable state to LOW
    }
  }
}
总结
这篇文章展示了一个关于如何将 PIR 运动传感器与 Arduino 结合使用的简单示例。现在,您可以在更高级的项目中使用 PIR 运动传感器。例如,您可以构建夜间安全灯项目。


