

释放双眼,带上耳机,听听看~!
一、本节介绍

在本课中,您将进行一个简单但有趣的实验 – 使用LED来创建流动的LED灯。顾名思义,这些流动的灯由连续八个LED连续点亮并逐渐变暗,就像流动的水一样。
二、材料准备
- 1 * Arduino Uno板
- 1 *面包板
- 若干杜邦线
- 8 * LED
- 8 *电阻(220Ω)
- 1 * USB数据线
三、原理讲解
本实验的原理只是依次打开八个LED。
四、实验步骤
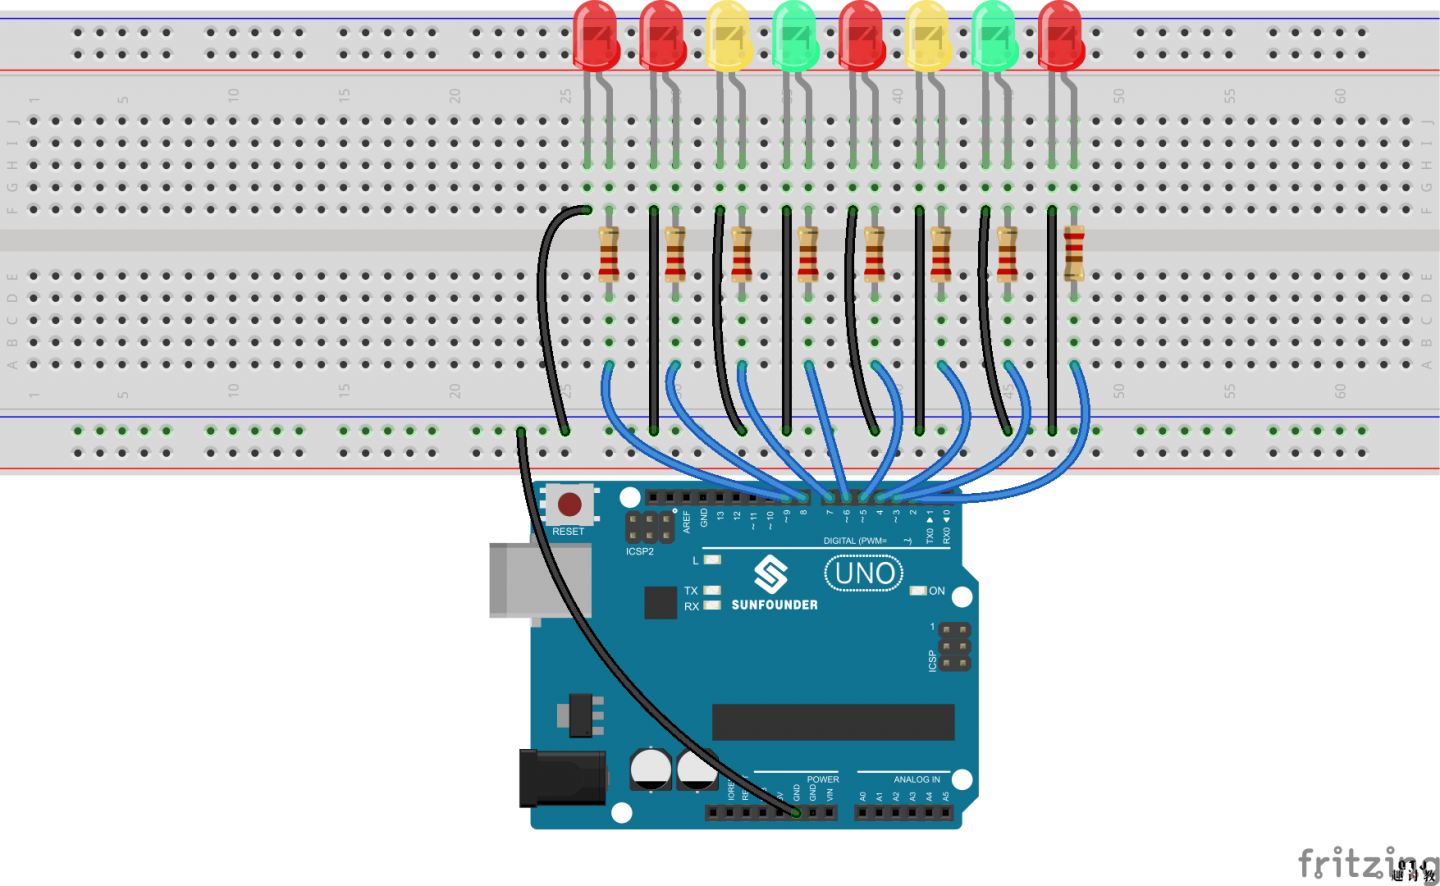
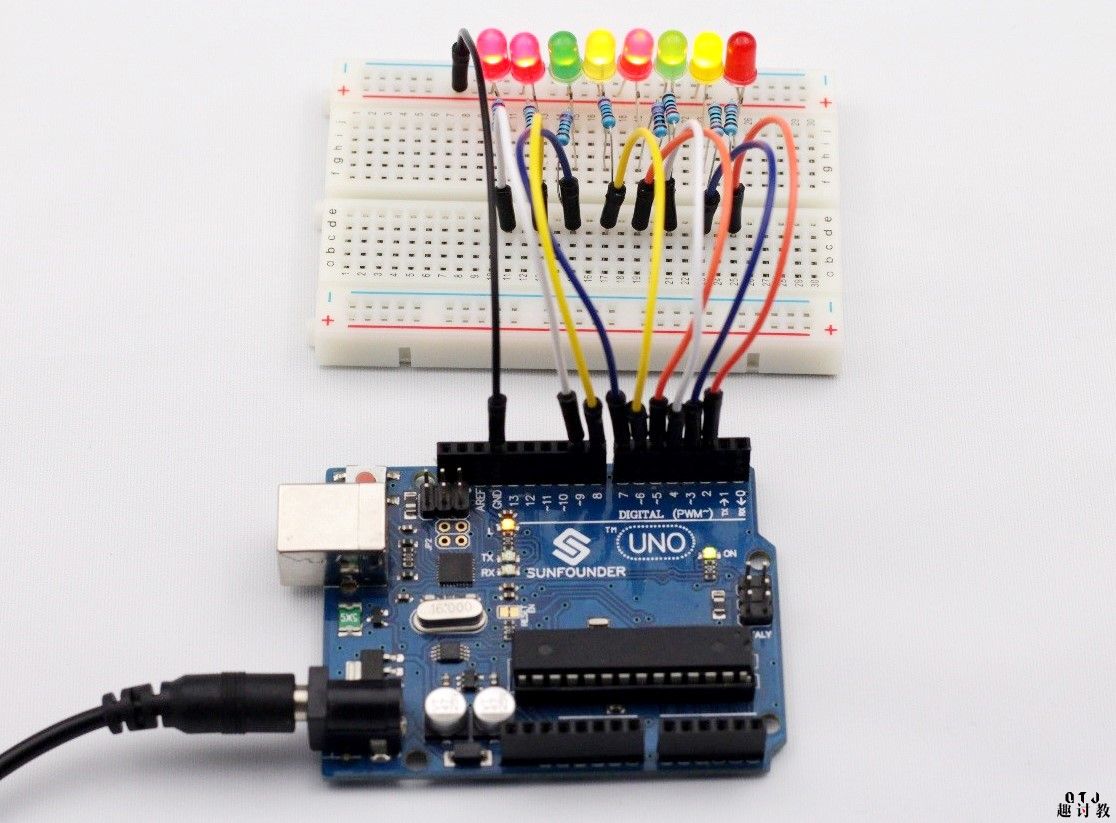
步骤1:建立电路
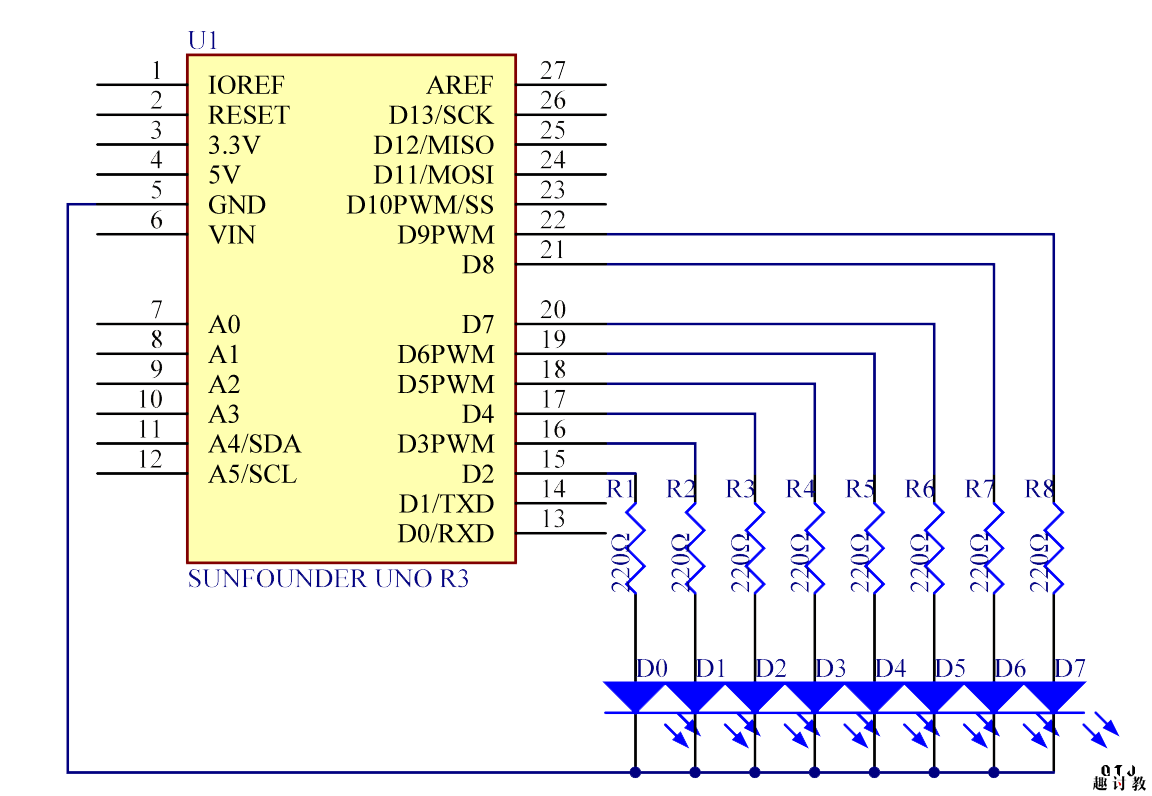
原理图
步骤2:编写程序
步骤3:编译代码
步骤4:将程序上传到Arduino Uno板
现在,您应该看到八个LED从左到右依次亮起,然后从右到左依次变暗。之后,LED将从右到左点亮,从左到右变暗。这个整个过程将重复,直到电路断电。
本节课代码:
[scu name=”arduino-ide-post” platform=”arduino:avr:uno”]
//***************************************
//LED流水灯
/* 八个LED将从左到右逐个点亮,然后从右到左逐个出去。
  之后,LED从右到左依次点亮,然后从左到右逐个出去。
  这个过程将无限期重复。* /
  //网址:http://www.qutaojiao.com/category/course/arduino
  //2017.10.15
  /**************************************/
const int lowestPin = 2;//最低的一个连接到引脚2
const int highestPin = 9;//最高的一个连接到引脚9
/**************************************/
void setup()
{
  //s设置引脚2到9作为输出
  for (int thisPin = lowestPin; thisPin <= highestPin; thisPin++)
  {
    pinMode(thisPin, OUTPUT); ///初始化thisPin作为输出
  }
}
/****************************************/
void loop()
{
  //在引脚上迭代
  //将引导从最低到最高
  for (int thisPin = lowestPin; thisPin <= highestPin; thisPin++)
  {
    digitalWrite(thisPin, HIGH); //LED亮
    delay(100);//等待100 ms
  }
  //从最高到最低
  for (int thisPin = highestPin; thisPin >= lowestPin; thisPin--)
  {
    digitalWrite(thisPin, LOW); //转动引导
    delay(100);//等待100 ms
  }  for (int thisPin = highestPin; thisPin >= lowestPin; thisPin--)
  {
    digitalWrite(thisPin, HIGH);
    delay(100);//等待100 ms
  }  for (int thisPin = lowestPin; thisPin <= highestPin; thisPin++)
  {
    digitalWrite(thisPin, LOW);
    delay(100);//等待100 ms
  }
}
[/scu]


for (int thisPin = highestPin; thisPin >= lowestPin; thisPin–) { digitalWrite(thisPin, HIGH); delay(100);//等待100 ms } for (int thisPin = lowestPin; thisPin <= highestPin; thisPin++) { digitalWrite(thisPin, LOW); delay(100);//等待100 ms 为什么要重复写两次